How To Restore The Lume On An Old Watch Dial That Stopped Glowing?
Do you own a vintage watch that no longer glows in the dark? You are not alone. Many old dials lose their shine after decades of wear.
Lume is the glowing material on watch hands and dials. Over time, it breaks down and stops working. This is a completely normal part of a watch aging.
The good news? You can bring that glow back to life. Restoring lume is a skill many watch owners learn at home.
In a Nutshell
- Old lume fades over time. This happens naturally, even on well cared for vintage watches. It’s not a sign of damage.
- Removal comes first. You must clear away every bit of old compound before adding new lume. Skipping this step causes problems later.
- A blunt needle or toothpick works best. These tools help you scrape off old lume without scratching the dial or hands underneath.
- Clean the surface well. Any leftover residue can stop new lume from sticking properly. Take your time here.
- New compound needs curing. Apply it carefully and let it set fully before wearing your watch again. Rushing this step ruins the finish.
- DIY or professional help both work. You can try this at home with the right materials, or send your watch to a repair expert.
Understanding Why Watch Lume Fades Over Time
Luminous compounds on watch dials break down naturally over decades. The material used on vintage watches was often radium based, which lost its glow as the radioactive elements decayed. Even modern lume formulas fade when exposed to sunlight, heat, and air over many years.
The chemical structure of old lume simply cannot maintain its brightness forever. Exposure to UV light actually speeds up the fading process. Temperature changes cause the compound to expand and contract, which weakens its molecular bonds. Moisture can also seep into the paint layer and degrade it from within.
Most vintage watches show noticeable lume loss after 30 to 50 years of regular wear. This is completely normal and expected. Watches stored in bright rooms fade faster than those kept in dark drawers. Even careful owners cannot prevent this natural aging process entirely.
The lume sits on the underside of watch hands and across the dial surface. When this coating deteriorates, it cannot reflect light the same way anymore. The glow becomes dim, then barely visible, and eventually disappears completely.
Understanding this fading process helps you appreciate why restoration matters. Your watch did not fail because of poor manufacturing. The lume simply reached the end of its useful life, just like any other material on the watch.
This knowledge also explains why complete removal of old compound is necessary before reluming. The degraded material cannot bond properly with new luminous paint. Starting fresh with a clean surface gives you the best chance of success when you apply new lume to your dial and hands.
Tools and Materials Needed for Lume Restoration
Restoring lume on your old watch requires specific tools and materials. Having the right items ready makes the job cleaner and safer.
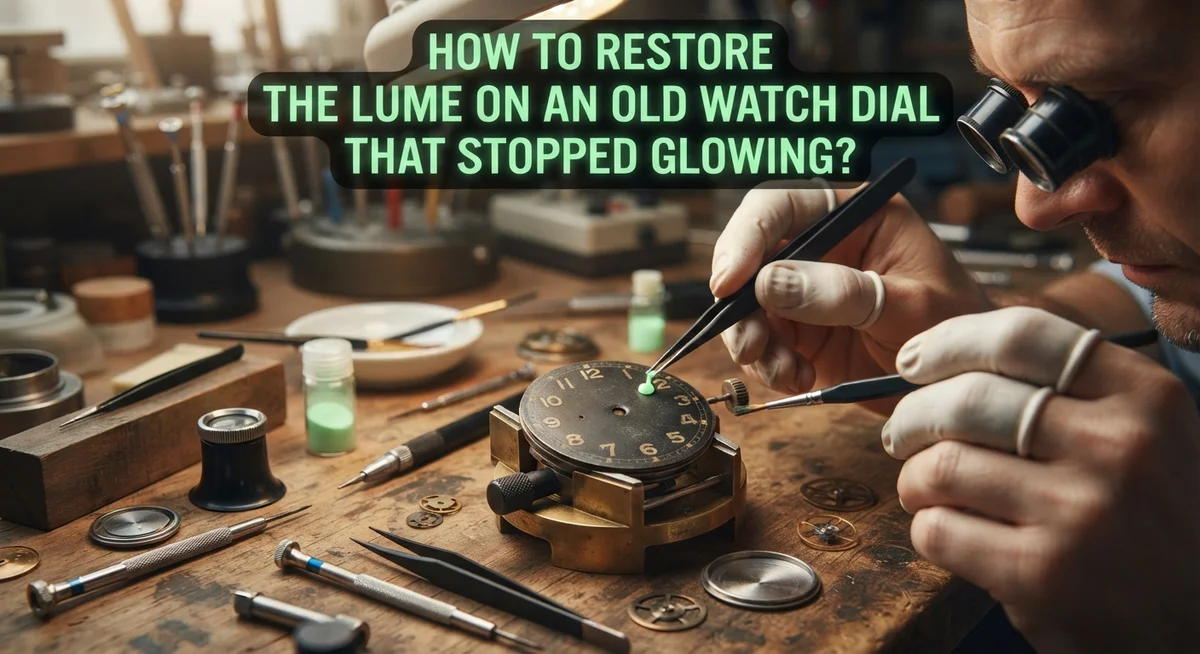
Removal tools come first. A blunt needle or toothpick works best for scraping away old luminous compound. These tools let you work carefully without gouging the dial or damaging delicate watch hands. Some people prefer using a soft brass brush for gentler removal on fragile surfaces. The key is choosing something that won’t scratch the underlying material.
Cleaning supplies are essential. You need a small container for soaking parts. Distilled water works well for rinsing away residue. A soft cloth or cotton swabs help you dry everything thoroughly. Make sure your cleaning materials are lint free to avoid leaving particles behind.
Surface preparation matters greatly. Fine grit sandpaper or a polishing cloth can help prepare the dial surface for new lume. This step ensures proper adhesion of the fresh compound. Work gently to avoid creating visible marks.
The new luminous compound itself is your main material. Modern lume comes in different forms. You’ll need a small brush or applicator to apply it evenly across the dial and hands. Some people use a toothpick for precise application on small areas.
Additional helpful items include a magnifying glass for detailed work and a well lit workspace. A small tray keeps your materials organized and prevents spills. Newspaper or a protective surface underneath catches drips.
Safety items matter too. Wear gloves to protect your skin. Work in a ventilated area since some compounds have fumes. Keep a damp cloth nearby for quick cleanup.
Having these materials ready before starting ensures smooth, successful lume restoration.
How To Safely Remove Old Luminous Compound
Removing old luminous compound safely requires patience and the right approach. Your goal is to strip away every trace of aged lume without harming the delicate dial or watch hands underneath.
Start with a blunt needle or toothpick as your primary tool. These instruments let you scrape the old compound away gently. Press the needle at a shallow angle and work slowly across the surface. Avoid stabbing downward, which can gouge the dial. Take your time here—rushing causes permanent damage.
For dial surfaces, work in small sections. Lift and peel away the old lume gradually. You may notice the compound crumbles or flakes. This is normal. Keep scraping until the surface feels smooth and clean to your touch.
Hand restoration requires extra care. Hold each hand steady while you remove lume from the edges. The compound often sits on top of the hand, making removal easier than you might expect. Work under good lighting so you can see exactly what you are doing.
After scraping, clean the surface thoroughly. Use a soft cloth slightly dampened with water or appropriate solvents. Wipe away all loose particles and residue. Any leftover bits will prevent new lume from adhering properly.
Inspect your work with a magnifying glass. Look for any remaining old compound hiding in corners or crevices. These hidden spots can cause uneven glowing later.
Complete removal is absolutely critical. New luminous compound will not stick well to old lume, and mixed compounds create poor results. The extra effort spent cleaning now pays off when your restored watch glows evenly and brightly for years ahead.
Preparing the Dial and Hands Before Reluming
Before you apply new luminous compound, your dial and hands need proper preparation. This step determines whether your restoration looks professional and lasts for years.
Start by examining both the dial and hands under good lighting. Look for any remaining old lume that might still cling to the surfaces. Even small traces of old compound can prevent new lume from adhering properly. Use your blunt needle or toothpick to gently lift away any stubborn residue. Work slowly and deliberately to avoid scratching the underlying dial or hand material.
Next, clean all surfaces thoroughly. A soft brush works well for removing loose particles and dust. Wipe the dial and hands with a clean, lint free cloth to eliminate any remaining debris. If your dial has text or markers, be extra careful around these areas.
For dial surfaces, consider using fine grit sandpaper or a polishing cloth to create a slightly textured finish. This texture helps new lume stick better. Sand lightly in one direction rather than in circles. Avoid aggressive scrubbing that could damage the dial’s appearance.
Allow cleaned parts to dry completely before moving forward. Moisture prevents adhesion and can cause new lume to fail.
Inspect everything with your magnifying glass one final time. You should see a clean, slightly dull surface ready for new compound. The dial should look bare and prepared, not shiny or wet.
Pay special attention to the edges where lume meets dial markers or hand posts. These areas often trap old compound. Clean them thoroughly using a small brush or compressed air if available.
This preparation phase takes patience, but it makes the reluming process far more successful.
Step-by-Step Guide to Applying New Lume
Now that your dial and hands are clean and ready, it’s time to apply the new luminous compound. This step requires patience and a steady hand to get good results.
Start by opening your new luminous compound container in a well lit workspace. Use a small brush or applicator to pick up a tiny amount of the compound. You want less material than you think you need, since you can always add more.
Apply the compound to the dial surface using smooth, controlled strokes. Work in small sections rather than trying to cover the entire dial at once. This approach helps you maintain even coverage and prevents the compound from drying too quickly.
For watch hands, apply the lume to the underside where it glows when light hits it. Be extra careful around the hand posts to avoid getting compound in areas where it can interfere with hand movement. Let each hand dry before moving to the next one.
Pay attention to consistency as you work. The compound should look smooth and uniform across the surface. If you notice drips or uneven spots, use a clean brush to smooth them out before the material sets.
Allow adequate curing time between coats if your compound requires multiple applications. Check the specific instructions for your luminous material, as curing times vary. Some compounds need several hours to fully harden, while others may require overnight drying.
Avoid touching the freshly applied lume while it cures. Any contact can create fingerprints or disturb the smooth finish. Once fully cured, your watch dial should glow brightly again when exposed to light.
Curing and Testing the Restored Glow
After you apply new luminous compound, the curing process is essential. Most modern lume formulas need 24 to 48 hours to cure fully. Check your specific compound’s instructions, as some variations cure faster or slower.
During curing, keep your dial and hands in a dry, dust free environment. Place them on a clean cloth away from direct sunlight. Avoid touching the wet compound, as this disrupts the curing process and creates uneven spots.
Temperature matters too. Room temperature between 65 and 75 degrees Fahrenheit works best for most compounds. Extreme heat or cold can slow curing or cause the lume to set unevenly.
Once curing is complete, it’s time to test the glow. Take your dial and hands into a dark room. Let your eyes adjust for a few minutes so you can see the luminescence clearly. A properly restored lume should glow bright green or blue depending on your compound type.
The glow should be even across all surfaces you relumed. Look for dark spots or thin areas where the compound may not have adhered properly. If you notice gaps, you can apply a second coat after the first fully cures.
Test the longevity by observing how long the glow lasts. It should remain visible for several hours in darkness. If it fades quickly, the compound may need better curing time or you may need to apply additional coats.
Keep your restored watch away from extreme conditions during the first week. This allows the lume to fully harden and bond with the dial and hands. After this period, your watch is ready for regular use and display.
Common Mistakes That Ruin a Relume Job
Reluming a watch dial requires precision, and mistakes during the process can ruin your restoration work. Understanding what goes wrong helps you avoid these pitfalls.
Damaging the dial surface is one of the most common errors. When you remove old lume, aggressive scraping or scratching can create permanent marks on your dial. Use blunt tools like soft needles or wooden picks instead of sharp implements. Work gently and let the tool do the job without forcing it.
Leaving residual old lume behind causes serious problems. Old luminous compound doesn’t bond well to itself, and new lume won’t stick properly to leftover material. You must remove every trace of the original compound. Incomplete removal leads to uneven application and poor glow results.
Applying lume to wet or dirty surfaces prevents proper adhesion. Even small amounts of dust or moisture create barriers between the new compound and your dial. Your preparation work matters as much as the application itself.
Rushing the curing process weakens your restoration. New luminous compound needs adequate time to harden fully. Handling your dial or hands too soon can smudge the lume or create uneven coverage. Patience during this stage determines your final results.
Using too much compound at once creates thick, uneven layers. More lume doesn’t mean brighter glow. Apply thin, controlled coats instead. This approach gives you better control and more professional looking results.
Working in poor lighting conditions makes precision difficult. You can’t see what you’re doing properly, leading to sloppy application and missed spots. Set up a well lit workspace before you start.
These mistakes are preventable with careful attention and slow, deliberate work throughout your entire reluming project.
Troubleshooting Uneven or Weak Glow Results
When you finish reluming your watch dial, the glow might look uneven or weak. This happens for several reasons, and you can fix most of them.
Uneven glow usually means the compound didn’t spread uniformly across your surfaces. Old lume residue left behind creates dark spots where new compound won’t stick properly. Check your dial under magnification to spot any crusty bits you missed during cleaning. Remove these stubborn pieces with a blunt needle or toothpick, working gently so you don’t scratch the dial base.
Weak glow often indicates incomplete compound application or thin coverage. Some areas received less luminous material than others. The solution is applying a second thin coat after the first one fully cures. This builds up brightness gradually without creating thick, lumpy layers that look bad.
Temperature during curing affects results too. If your workspace was cold, the compound may not have bonded correctly to the dial surface. Warm environments around 70 degrees Fahrenheit work best for proper curing and stronger glow.
Surface preparation matters significantly here. If you applied new lume over slightly damp or dusty areas, adhesion suffers. This causes the glow to appear patchy or weak. Let your dial sit in dry air for several hours before applying any compound.
Test your glow in complete darkness after waiting the full curing time. Some compounds need 24 to 48 hours before reaching maximum brightness. If results still disappoint you, another thin application usually solves the problem.
Work slowly and avoid rushing between coats. Patience during the restoration process prevents most glow problems from happening in the first place.
Final Thoughts
Restoring lume on an old watch dial takes patience. You cannot rush this process and expect good results.
Every step matters, from removing old compound to testing the final glow. Skipping steps leads to disappointment.
Your watch dial holds history. Bringing back its glow connects you to that story in a real way.
Start slow if you are new to this. Practice on a less valuable piece before working on your favorite watch.
Take your time with removal. Rushing this step damages hands or dial surfaces that you cannot easily replace.
Clean surfaces thoroughly before applying new compound. This single step prevents most common problems later.
Apply thin, even layers of lume. Thick layers look uneven and take longer to cure properly.
Let curing happen naturally. Do not force this process with heat or by touching the surface too soon.
Test your work in complete darkness. This shows you the true results of your restoration effort.
Mistakes happen, even to careful hobbyists. Learn from uneven glow or weak results instead of giving up.
Vintage watches deserve careful treatment throughout this process. Their age makes them fragile in ways newer pieces are not.
Some watches benefit from professional restoration instead of DIY methods. Complex or valuable pieces often need expert hands.
Know your limits before starting. A failed attempt can cost more than professional service would have.
Fading lume is normal on old watches. Decades of wear naturally dim the glow that once shined bright.
Restoring that glow brings new life to timepieces you love. The effort feels worth it once you see the results glowing again.
Practice makes this skill easier. Each watch you relume teaches you something for the next project ahead.
Frequently Asked Questions
Can I restore vintage lume without removing the old compound first?
No, you should remove the old compound completely. Old lume can break and shed if you try to apply new material on top of it. The degraded compound won’t provide a solid base for fresh luminous material. Your new lume won’t stick properly and will fail quickly.
Take time to remove every bit of the old compound using a blunt needle or toothpick. Work carefully so you don’t scratch the underlying dial or hand surfaces. This step takes patience, but it’s essential for success.
Why does my newly applied lume glow weakly even after curing?
Weak glow usually means the compound didn’t get applied thickly enough. You might have used too little material, or the layers were too thin. Incomplete coverage is another common cause.
Temperature during curing also affects how well your lume glows. Cold environments slow the chemical process. Make sure you follow the curing time recommendations completely. Don’t test your work too early, as the compound needs full time to set properly.
Is it normal for old watch lume to stop glowing?
Yes, absolutely. Vintage lume naturally degrades over decades. The luminous compounds used in older watches break down from age and light exposure. This fading is completely normal and happens to all old watches.
This is why restoration is possible and worthwhile. You can bring your watch back to life by applying fresh compound that glows brightly again.
Should I attempt lume restoration myself or hire a professional?
That depends on your comfort level and experience. DIY restoration works well if you have steady hands and patience. The process requires careful work to avoid damaging your dial or hands.
If your watch is rare or valuable, professional restoration might be the safer choice. Professionals have specialized tools and experience. Consider your skill level honestly before deciding.

Hi, I’m Lucy Jones, a dedicated watch enthusiast and reviewer. I spend my time hunting down, testing, and evaluating the most intriguing wristwatches on the market. My goal is to guide you through the overwhelming choices with honest, hands-on insights into every timepiece.